Microsoft Entra ID
Use Microsoft Entra ID as a User Source so the people who already sign in with their Microsoft work or school account can sign in to your MCP Gateways. This guide walks you through what to do in the Microsoft Entra admin center. Once you have the values it tells you to copy, create the User Source in Arcade.
Before you start
- An account with one of these roles in your Microsoft Entra tenant: Cloud Application Administrator or Application Administrator.
- An Arcade project where you’ll create the User Source.
Register an app in Microsoft Entra ID
Open the Entra admin center
Sign in to the Microsoft Entra admin center with one of the roles listed above.
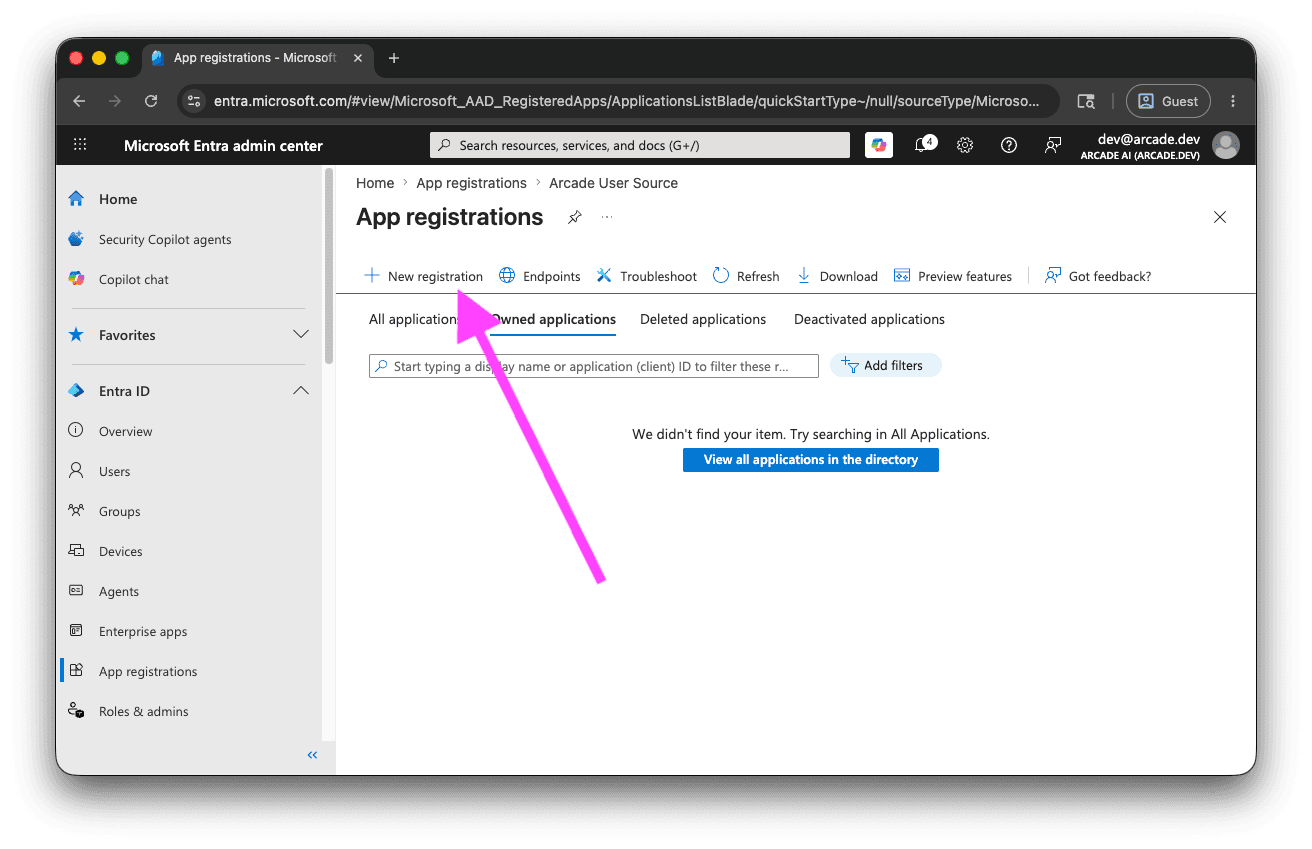
Go to Entra ID → App registrations → New registration.
Name the app and choose who can sign in
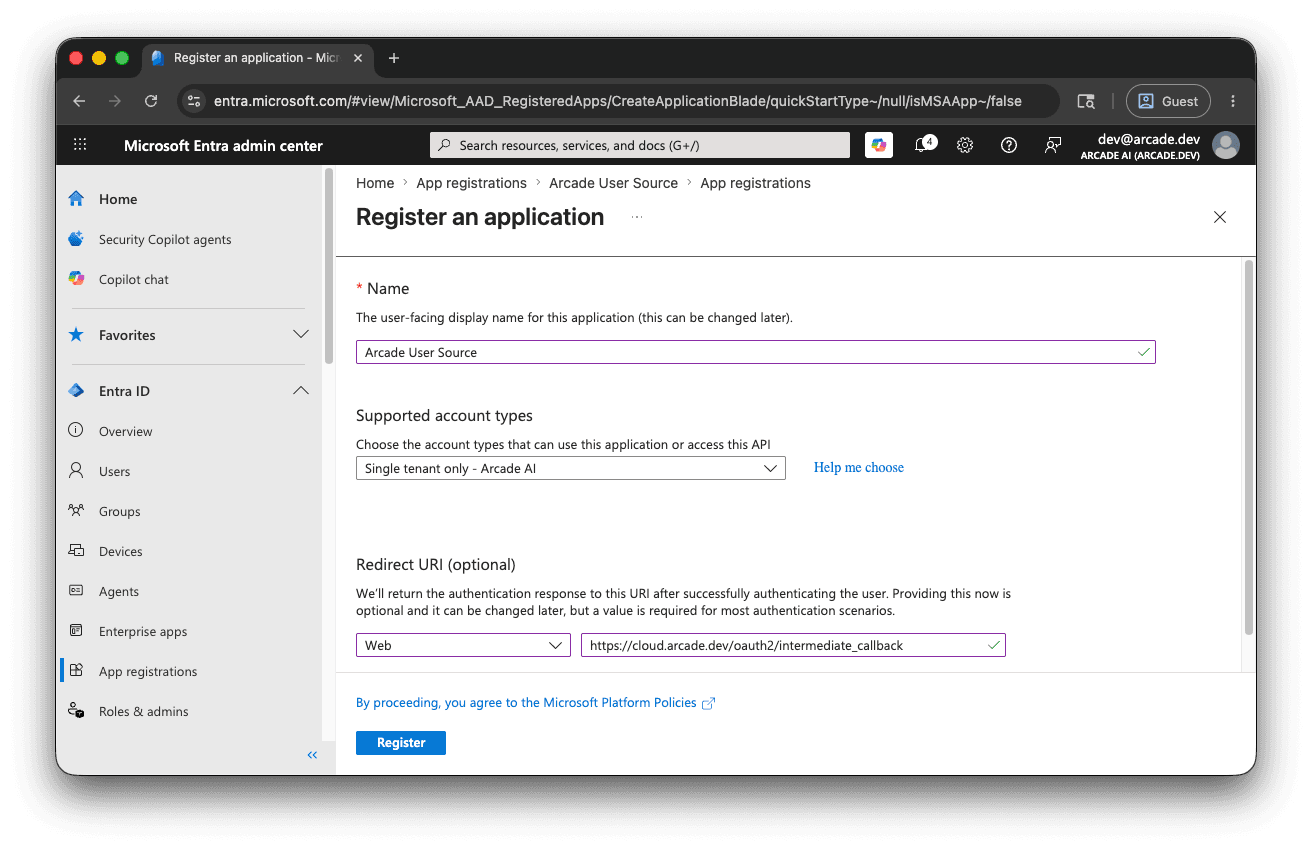
Give the app a name your team will recognize, for example Arcade MCP Gateways.
Under Supported account types, pick one:
- Single tenant only — your tenant name: only people in your own Microsoft Entra directory can sign in. Pick this unless you specifically need to accept users from organizations you don’t control.
- Multiple Entra ID tenants: people with a Microsoft work or school account in any Microsoft Entra directory can sign in.
Don’t pick the Any Entra ID Tenant + Personal Microsoft accounts or Personal accounts only options. Those include personal consumer accounts (Skype, Xbox, and so on), which sit outside the workforce identity model that User Sources are designed for.
Your choice affects the Issuer URL you’ll copy into Arcade later, so make a note of which option you picked.
Add the Arcade redirect URL
In the Redirect URI section, select the Web platform and paste this URL:
https://cloud.arcade.dev/oauth2/intermediate_callback
Click Register. Entra creates the app and opens its Overview page.
Create a client secret
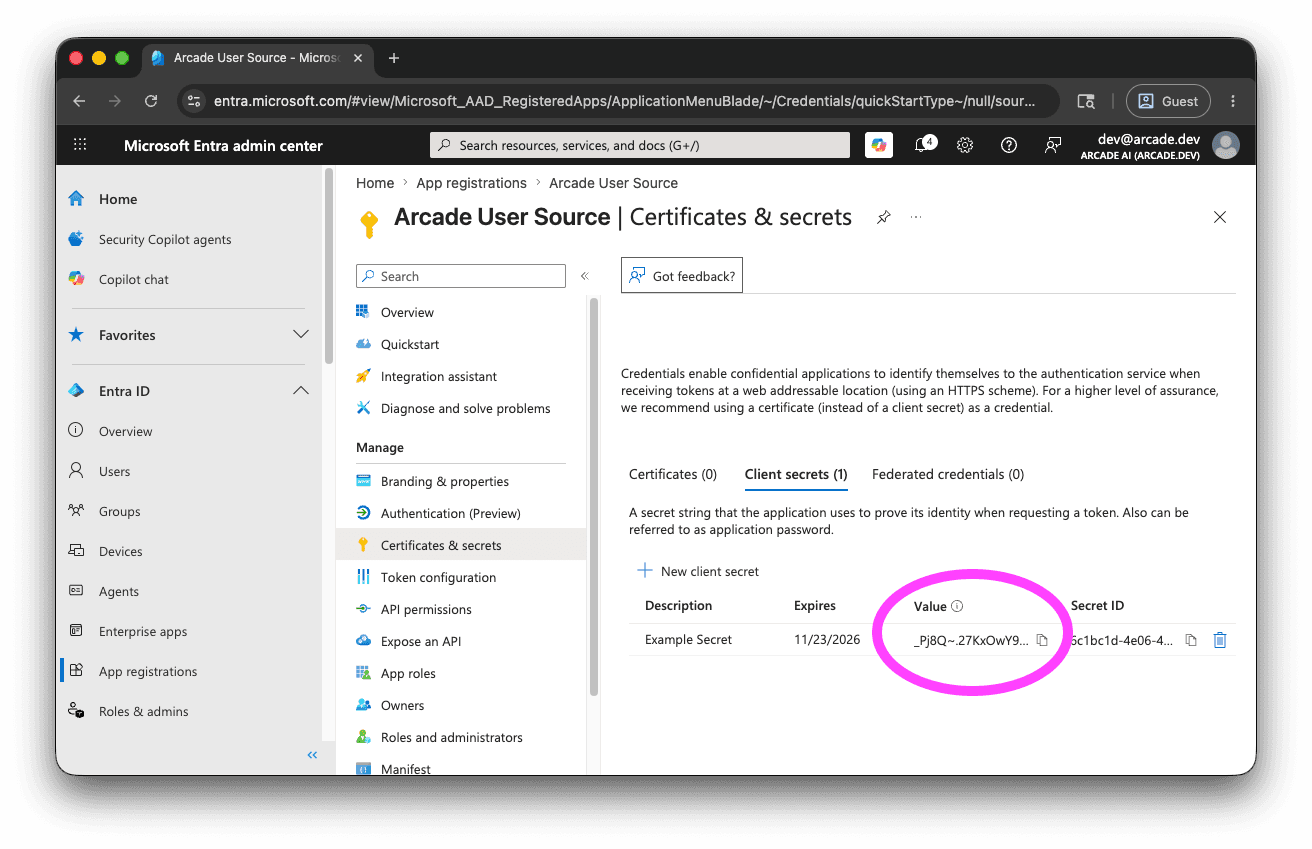
In the new app’s left menu, go to Certificates & secrets → Client secrets → New client secret.
Add a description (for example, Arcade User Source) and pick an expiration period. Click Add.
Copy the Value column immediately and keep it somewhere safe—Entra hides it as soon as you leave the page. You’ll paste this into Arcade as the Client Secret.
Arcade currently supports client secrets only, not certificate credentials.
Allow the openid permission
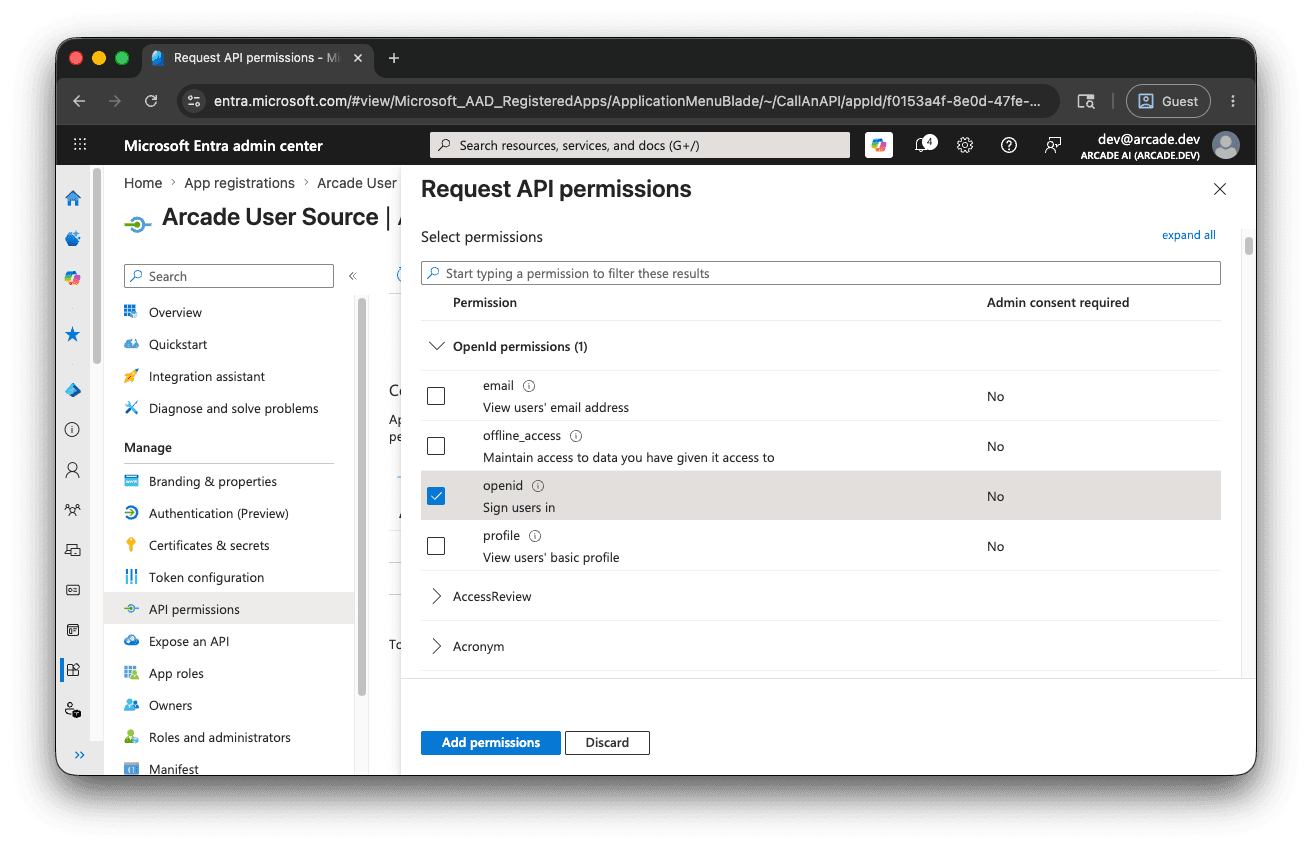
In the app’s left menu, go to API permissions.
Microsoft adds User.Read for you by default; leave it alone. Then click Add a permission → Microsoft Graph → Delegated permissions and check openid. Click Add permissions.
openid is the only permission Arcade needs. You can optionally add profile and email if you want Entra to include those claims in the token; Arcade doesn’t require them today.
Copy these values to Arcade
Open the app’s Overview page in Entra and copy these values into Arcade’s User Source form:
| Arcade field | Where to find it in Entra ID |
|---|---|
| Issuer URL | https://login.microsoftonline.com/{tenant-id}/v2.0 if you picked Single tenant only, or https://login.microsoftonline.com/organizations/v2.0 if you picked Multiple Entra ID tenants. {tenant-id} is the Directory (tenant) ID field on the Overview page. |
| Client ID | The Application (client) ID field on the Overview page. |
| Client Secret | The value you copied when you created the client secret. |
| Subject Claim | Use oid. The default sub is unique per app registration, which makes it harder to trace a signed-in user back to their identity in your Entra directory. oid is the same identifier across your directory. It’s also a better choice than email, because oid stays the same if the person’s email address ever changes. |
Create the User Source in Arcade
Open the User Sources dashboard , click Create User Source, and paste the values from the table above. For a walkthrough of the form, see Create a User Source in the User Sources overview.
Once the User Source is active, attach it to an MCP Gateway by following Create via Dashboard and picking User Source under “Non-Arcade Users” in the gateway form.
Notes
- PKCE: Arcade always uses PKCE when authenticating end users. Entra ID accepts PKCE automatically on the Web platform, so you don’t need to change any Entra setting.
- Client secret rotation: Entra client secrets expire. Rotate yours before the expiration date. See Rotate the client secret in the User Sources guide for how.
- Custom subject claims: If you need Arcade to identify end users by a value other than
oid, configure that value as an optional claim on Entra’s ID token, then set the User Source’s Subject Claim to its name. Arcade can read any claim that ends up in the ID token; it doesn’t have access to access tokens or other token types.